• Skip to main content
  • Skip to primary sidebar

Blend with Spices logo

  • Home
  • Recipe Index
  • Eggless Baking
  • Curries
  • Sweets
  • Breakfast
  • Snacks
  • Chutney
  • Festival Recipes
    • Diwali Sweets Recipes
    • Ganesh Chaturthi Recipes
menu icon
go to homepage
search icon
Homepage link
  • Home
  • About Me
  • Recipe Index
  • Festival Recipes
  • Eggless Baking
    • Facebook
    • Instagram
    • Pinterest
    • Twitter
    • YouTube
  • ×
    Home » Uncategorized » How to make Khoya at home ~ Homemade Mawa / Khoa Recipe with step by step pictures

    Last Updated: July 29, 2020 | First Published on: October 9, 2013 by Hari Chandana Ponnaluri

    How to make Khoya at home ~ Homemade Mawa / Khoa Recipe with step by step pictures

    12 shares

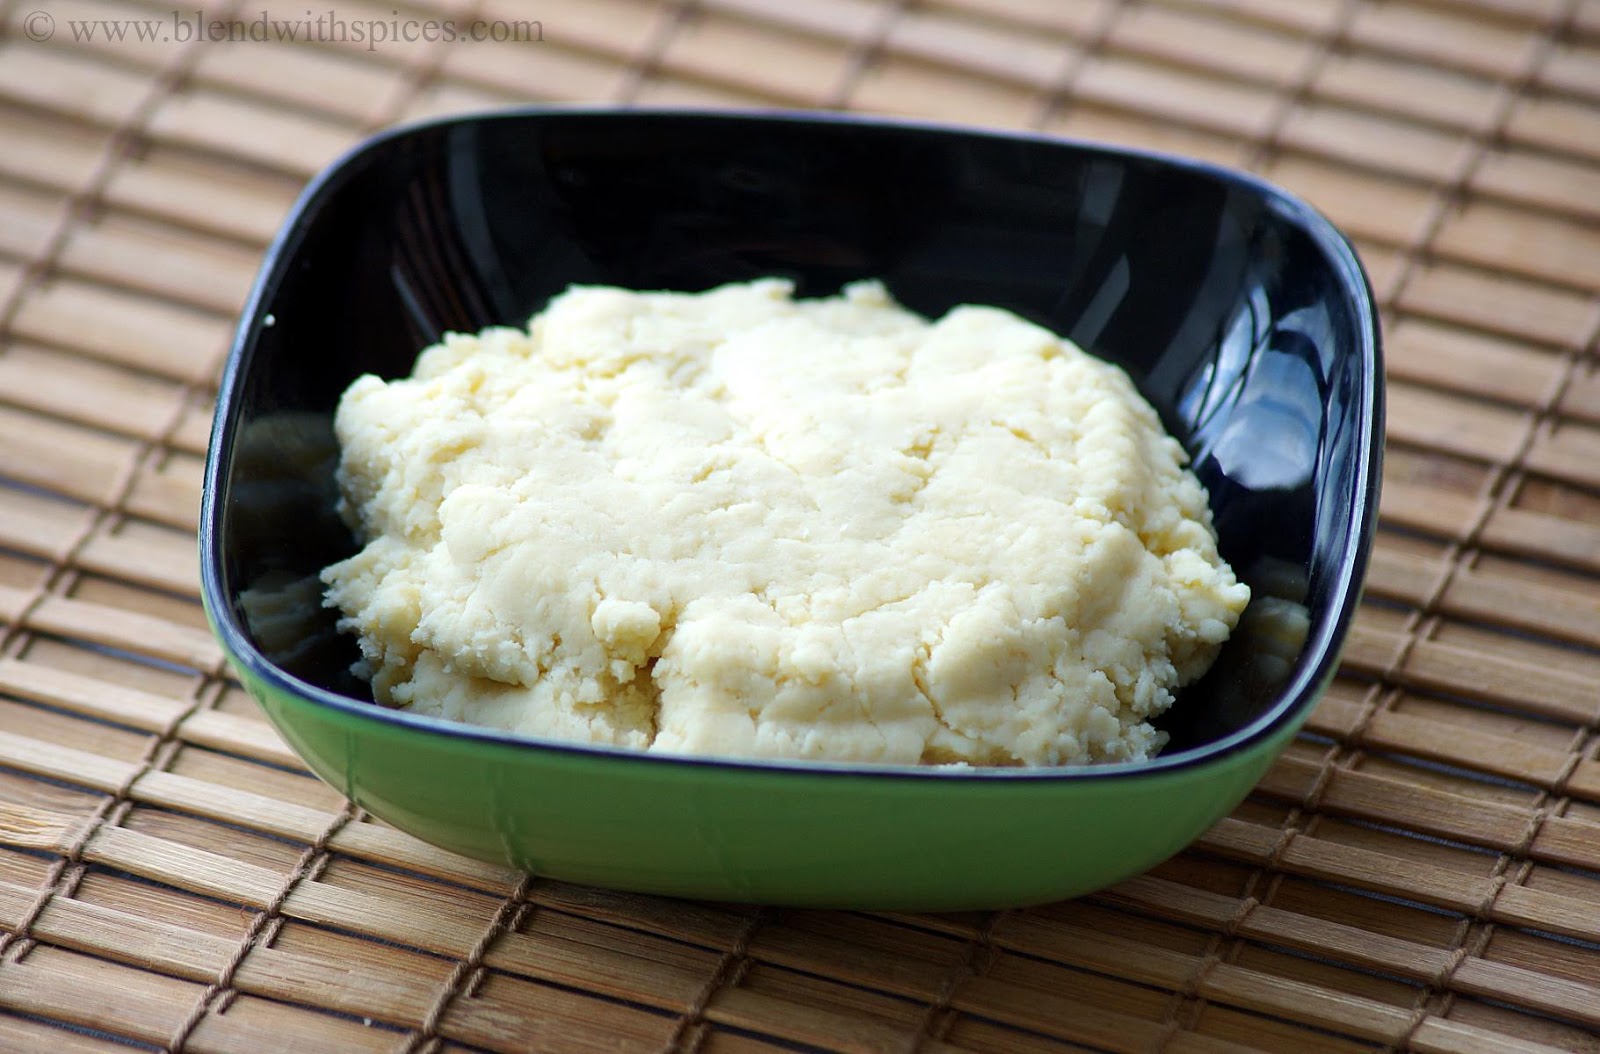
    Indian Khoya / Khoa / Mawa / Kova Recipe
    Hari Chandana P Indian Basics
     
    Prep Time: 0 mins    |  Cook time: 1 Hour |  Makes: about 1.5 cups

    Ingredients:


    • 1.5 litres Milk

    Method:


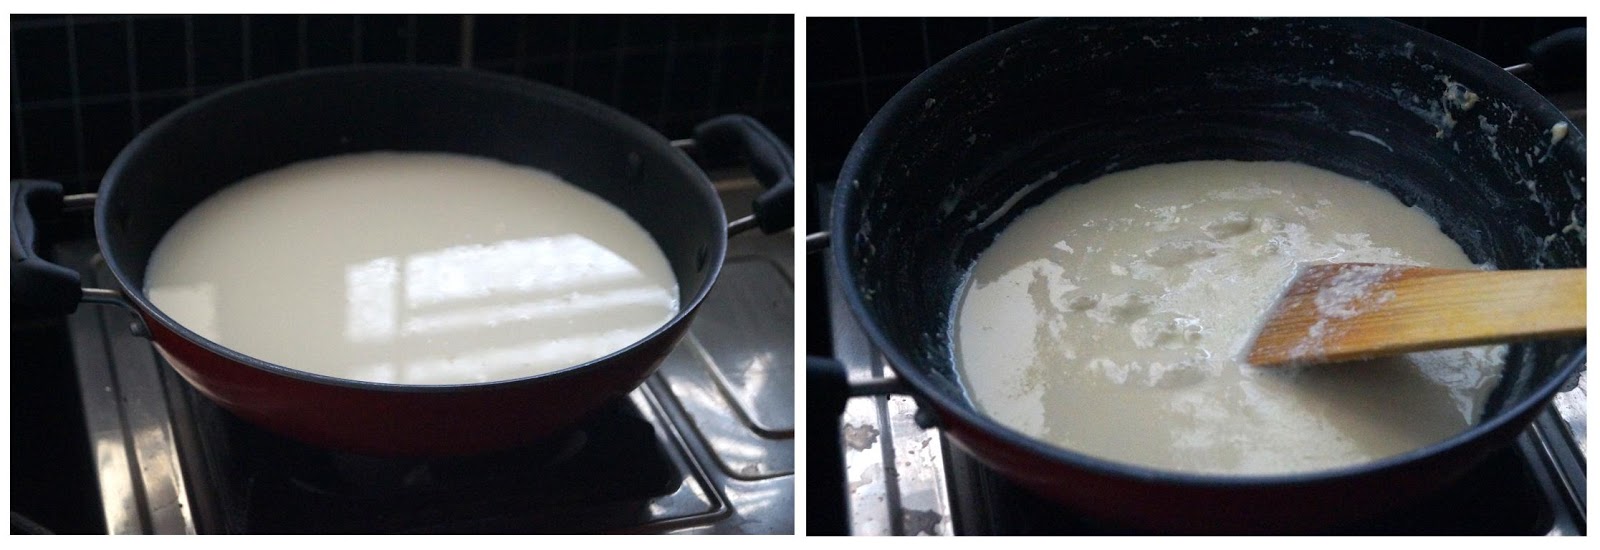
    • Take the milk in a deep and wide non stick pan.
    • Bring the milk to a boil.
    • Once the milk boils, reduce the flame to between medium to low.
    • Scrap the sides of the pan and stir occasionally.
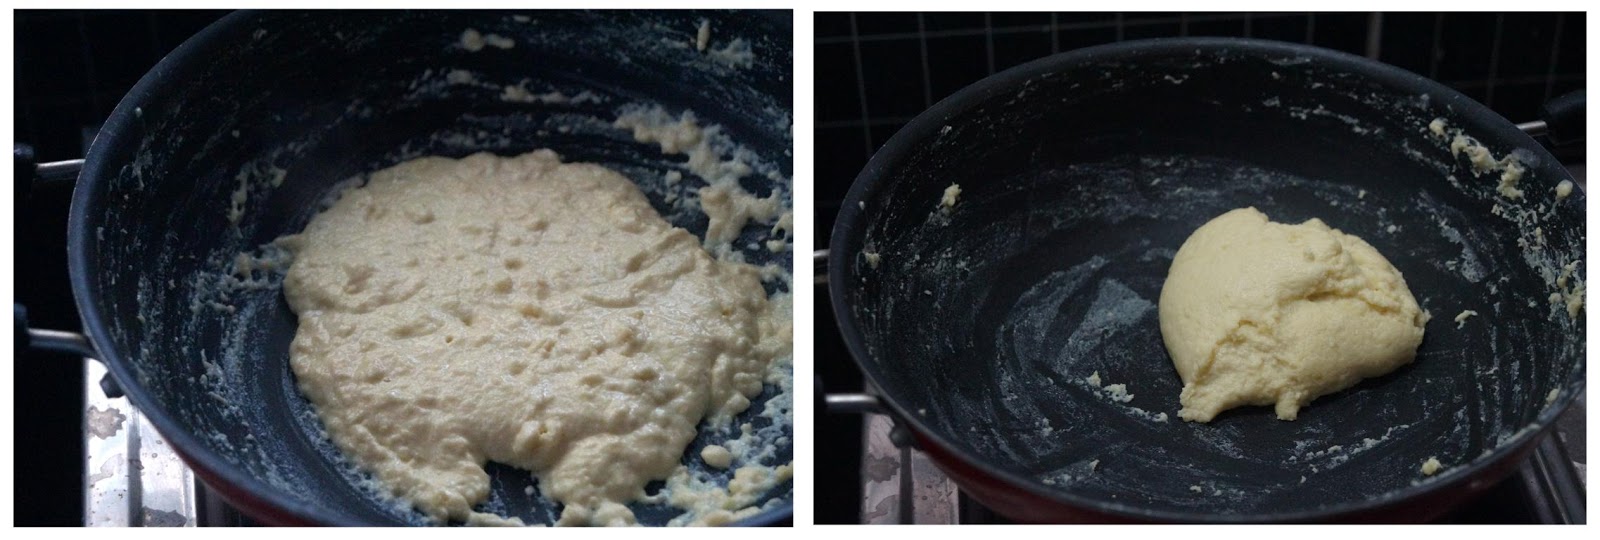
    • When the milk thickens, reduce the flame to low. Stir and scrap the mixture constantly.
    • Keep stirring until the milk completely thickens and forms the khoya.
    • Remove it from the flame and let it cool.
    • Khoya will thicken some more as it cools.


    You might also like to check these recipes:

    • Cumin Powder Recipe
    • Dhania Powder / Coriander Powder
    • How to make Paneer at home
    • How to make Peanut Butter
    • Homemade Bread Crumbs


    12 shares

    Filed Under: Uncategorized Tagged With: milk

    Reader Interactions

    Comments

    1. srikars kitchen says

      October 09, 2013 at 4:57 pm

      Nice entry.. looks perfect.. nice clicks..

      Reply
    2. Priya Suresh says

      October 09, 2013 at 7:36 pm

      Homemade mawa is always the best, so next post is a sweet with mawa?..

      Reply
      • Hari Chandana P says

        October 10, 2013 at 3:43 am

        🙂

        Reply
    3. Maha Gadde says

      October 09, 2013 at 9:10 pm

      very useful n nice cliks..

      Reply
    4. kitchen queen says

      October 10, 2013 at 6:13 am

      perfect home made khoya.

      Reply
    5. Priya R says

      October 10, 2013 at 6:47 am

      wow beautifully explained post 🙂 waiting for the sweet now 😉

      Reply
    6. Yes Cook says

      October 10, 2013 at 7:59 am

      This comes very handy. Love the pictures.
      Thanks for sharing.

      Reply
    7. Aps prabhu says

      October 10, 2013 at 3:13 pm

      lovely post…needspatience…lovely clicks

      Reply
    8. Pravina Parikh says

      April 07, 2014 at 5:52 pm

      Hi Hari I like your fresh mawa recipe pictures nice thanks

      Reply
    9. Pravina Parikh says

      April 07, 2014 at 5:52 pm

      Hi Hari I like your fresh mawa recipe pictures nice thanks

      Reply
    10. Nikki says

      October 26, 2021 at 6:03 am

      Do I need to use full fat milk for this recipe, or will 2% work?

      Reply
      • Hari Chandana Ponnaluri says

        November 02, 2021 at 2:18 pm

        Use full-fat milk if possible.

        Reply

    Leave a Reply Cancel reply

    Your email address will not be published. Required fields are marked *

    Recipe Rating


    Primary Sidebar

    A little about me..

    Hi!
    Glad you’re here!. I am Hari Chandana Ponnaluri, an Indian food blogger currently living in Spain. Blogging and photography have been my world for about 13 years now and all I need are – a camera, some ingredients & props, and an internet connection to make your while worth on my website!☺ .. Read More…

    Join 270K+ Followers!

    Search for Recipes

    Recent Recipes

    Footer

    About

    • Privacy Policy

    Don’t Miss A Recipe!

    Subscribe to our mailing list

    Contact

    • Contact

    Copyright © 2020 Blend with Spices